Wednesday, 14 December 2016

Typography for story


Objective
To introduce the concept of designing typography for a specific artefact.
To create a design that could be used on for your book illustration.

Task
Read through the presentation on Anna Mullin above. Look at the various design steps involved and consider the rationale behind the work.
Design your own type that links with your story.
You will be asked to present a rationale of your own, so the 'thought' that goes into your decision is important. 'It just looks nice' is no longer quite good enough.
Scroll down this article HERE to the 'Were you also involved in the typographic elements?' part. Read it to find out another point of view.

Extra marks - full character set
Mega extra marks - Draft of a cover with your type design included. You might wish to attempt a cover or poster for the book using type only.

Presentation
Sketchbook and Google Slides.

You will graded holistically on
Rationale (relate to final design)
Research (moodboard)
Drafting (notebook scamping)
Sketchbook development (colour or texture ideas, or placed on exmples)
Final design(s)


Time needed
8 hrs

Deadline
Thursday 12th Jan 3.15.

Friday, 9 December 2016

Independent study - Collaging Silhouettes.


Objective
To improve your photography and Photoshop skills 

To gain an understanding of collaging silhouettes.
To further develop your ideas in relation to your story


Task
I might be interesting to attempt 2 versions of this task. One using drawing and photos and the other just photos.
Create a sketchbook piece(s) using the 'collaging silhouettes' technique.
Draw or photograph one or more of your characters acting a scene. To have fun and get the most marks when photographing your characters, you must dress them and stage them properly - not just a Snapchat of your best mate.
Using either a craft knife or Photoshop layer mask, emulate the technique above.

Extra! Find other examples of artists who have used collaging or photo montage in an interesting way

Expected time
2 hrs

Deadline
The start of the lesson, Friday 16th Dec.

Wednesday, 7 December 2016

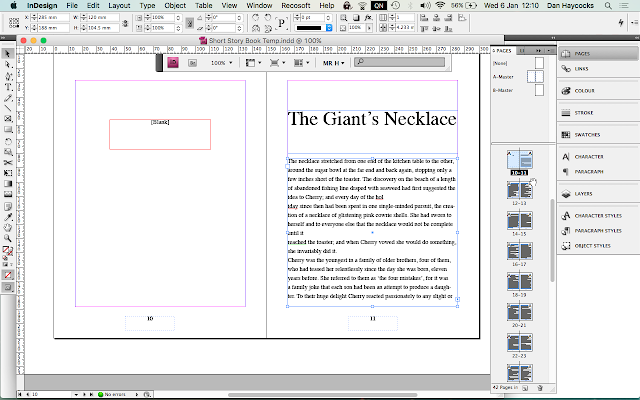
InDesign Book Template


Full book template to be edited with InDesign HERE

Square version HERE

When you have completed tasks related to your chosen story,  it is a good idea to preview them in the context of your text.
Before you add your textt, ensure that it has been made 'Plain Text' in text edit.
Download the template and add your text and images to get a flavour of what your work might look like. Integrate the text and images on either internal pages or a cover.
Screen shot the results and post to your presentation.

Friday, 2 December 2016

Independent study - Cubomania


Objective
To improve your mixed media skills 

To gain an understanding of Cubomania.
To further develop your ideas in relation to your story


Gherasim Luca, a member of the Surrealist group, devised a collage technique termed 'Cubomania'. This involved drawing a grid over an image, cutting the image along the lines and randomly reassembling the parts to form a new image.

Task
Create a sketchbook piece(s) using the 'Cubomania' technique.
Draw (in detail) or photograph one or more of your characters. To have fun and get the most marks when photographing your characters, you must dress them and stage them properly - not just a Snapchat of your best mate.
Then... draw a grid over your image and cut the image along the lines, reassembling the parts to form a new image

Extra! Can you find any info on Luca? A quote, an image, other similar artists, uses in other media? etc etc.

Expected time?
2 hrs

Deadline
The start of the lesson, Friday 9th Dec.

Friday, 25 November 2016

Independent study - Character photofits


Objective
To improve your mixed media skills
To further develop your ideas in relation to your story


Task
Create 3 characters as a photofit.
Either work in analogue (print off your features and glue them together in your sketchbook) or create using photoshop.
At least 5 different features each.
Annotate with notes as to how you imagine the characters traits and how this is reflected in the composited image.

Expected time?
2 hrs

Deadline
The start of the lesson, Friday 2nd Dec.

Monday, 21 November 2016

Magazine Project Deadline


Magazine cover copies (Work in progress, scamps)
Magazine Cover Copies (Final designs)
Your magazine cover (Drafts)
Your magazine cover (Photoshoot / illustration)
Your magazine cover (Work in progress)
Your magazine cover (Final design)

Deadline: Friday 25th of November

Further Reading Tasks


Further Reading Tasks
Each week, on Wednesdays, I will set a further reading task to broaden your knowledge and understanding of graphic communication.
Some of the reading will be from Hollis' History of Graphic Design, but as this is only a small part of graphic communication, I will also give you other articles of interest.
Please take notes as you read (note talking ideas here) and have your notes ready for lessons and discussion on Wednesdays.
Each reading task will be approx 2 hrs.
To keep an eye on your reading tasks, there is a link at the top of the page.

Independent study - contour line drawing of locations / settings.


Here is a drawing of my cupboard. Excuse the bad image :(

Objective
To improve your drawing skills
To further develop your ideas in relation to your story


Task
2 pages of contour line drawing of locations. 
Don't be afraid to let your lines overlap. 
Draw in pen, no erasing.
At least 4 drawings per page.

Expected time?
2 hrs

Deadline
Start of lesson, Friday 25th Nov

Tuesday, 15 November 2016

Inky overlay process - Aspect To Aspect


Objective
To create a set of illustrations that utilise the design process for making screen prints.
To allow for chance to make an appearance in your work.
To work on multiple images in one go with the goal of increasing your success rate.
To introduce you to the idea of 'aspect to aspect' composition.

Task
1. Choose a location from your short story.

2. Gather 10 images from this location, different angles and distances; close ups, aerial, long shots etc. Take your own, or use the web. Put them into an A3 page using Photoshop - see my example below

3. Divide your A3 page up into 9 portrait or 8 landscape panels 

4. Using the lightbox, A3 layout paper and black Indian ink, felt tips, crayon, collage etc,  ink/draw your panels. This is the bit where you need to concentrate as this is important.  You are going to be inking this set of images 3 times. Each of these 'ink passes' needs to be approached in a different way. N.B. Those students that are confident with drawing, do some that are not on the lightbox—'eyeball' them.
Where it's darkest, ensure that this part is inked on all 3 sheets. Lightest parts only get one inking or 'pass'. Geddit?

Presentation
Photograph each of the 3 'inked' sheets, your A3 reference sheet, screenshot your w.i.p. (use close ups).
Post a Jpeg of your favourite outcomes.

Checklist for assessment
Lots of interesting textures used.
Consideration given to tones. Dark tone = 3 passes, Light tone = 1 pass
Exploration of colour.
Good drawing

Deadline
TBC

Example below.

Anatomy of an Illustrated Book

Story Illustration Ideas


Wednesday, 9 November 2016

Hand-in for Interim Assessment


At this time in the course, Sixth Form tutors are expected to enter a grade to represent how you are coping with your chosen courses. For Graphic Communication, I will look at all of the work you have completed so far and how you are presenting it within your sketchbooks and Google Presentation.
Please ensure that you have looked at the GOOD PRESENTATION post.

The tasks that require presentation include:

Badges  (Drawings, research)
Badges (Work in progress)
Badges (Final designs)
Corita Kent, No-Staples Book (Work in progress, Pinterest screenshots)
Corita Kent, No-Staples Book (Final design)
Magazine cover copies (Work in progress, scamps)
Magazine Cover Copies (Final designs)
Your magazine cover (Drafts)
Your magazine cover (Photoshoot / illustration)
Deadline for hand-in: Monday 14th of November

Wednesday, 2 November 2016

Reading and note-taking task 1


(Above are two ways of taking notes from a short chapter. The top one takes longer but is much more helpful when attempting to remember and recall information.)

Objective
To give you an overview of the history of Graphic Design in order to inform your written analysis work.

Task
Read the introduction and chapter one of Richard Hollis' - The History Of Graphic Design.
N.B. Don't be put off, use a dictionary and the web for help. You are entering the world of grown-up reading with big words and concepts — if you don't work at it, you won't get it. 
Take notes in your notebook.
Write down 6 questions about the text.
Answer 3 your self and bring 3 in for me or the group to answer.

Presentation
Notes in sketchbook or better still in your notebook.

Checklist for assessment
Detailed notes

Deadline
TBC

Drafting & Photoshoot


Objective
To prepare resources for your magazine cover

To further the design process towards your magazine cover

Tasks
1. Draft 4 examples of your magazine. 
See my examples above but do at least four—two per sketchbook page
To get ideas for my drafting I have typed 'musician' into Pinterest and used the results as a springboard. Do the same. These should be 'tighter' than the copied scamps.

2. Complete a photoshoot of images for the cover or equivalent illustration artwork

Presentation
Post a contact sheet of images to your blog with relevant annotations
Sketchbook drafting

Checklist for assessment

Inventive drafting, lots of relevant and well lit images

Time needed?
3 hrs

Deadline

tbc

FAQ.
Sir, can you suggest some basic resources for taking photos of my subject in natural light?

Below is a link to a blog post that deals with this very issue!

Wednesday, 19 October 2016

Magazine Research


Objective
To source and collect similar artefacts that will act as models and stimulus for your design.

Task
Using the web (Pinterest, google search etc), reference books and actual printed examples, collect together examples of covers and double page spreads (DPSs) that interest you in terms of design.

Tip: go into a town library and photograph the cover and DPSs. Failing that, try WHSmiths in Shrewsbury.


Presentation
You have to get all of this stuff on your blog somehow. Try these methods:
Screenshot all of the Pinterest boards that you have collected.
Place all of your research photos into a Google Presentation (online powerpoint) and embed on your blog.
Make a physical scrapbook—photograph the separate pages.
Embed youtube / Vimeo videos on the subject of magazine design.

Checklist for assessment
Screenshots of pinboard (50+ pins)
Evidence of physical examples that have been photographed
Basically, the presntation needs to reflect that you have spent a lot of time and effort looking by yourself.

Deadline
tbc

Brainstorming list - ideas for a magazine name.


Pic 1


Pic 2

Objective
To begin forming ideas for your magazine.

Task

In your sketchbook, create a page of lists that evidence how you have arrived at the name of your magazine.
Start by using list titles like: Terms   Types  Tools  Classics   Adjective  Existing (see Pic 1)

Fill these lists by either using your knowledge of the subject or utilising the web to look on glossaries and terminology lists.
Then put the collected words into a thesaurus and see what you get.
Next, attempt to put these words together in different ways, maybe spell them differently. Fill a page.
This is the creative bit, don't feel restricted—the good ideas come when you let go a bit. (see Pic 2)

Presentation
Photograph and post to your blog.

Checklist for assessment
Plenty of relevant and irrelevant, creative ideas / clear photo / at least 2 full pages—lay it out the same as I have, but include more / clear written work.

Deadline
Start of Friday's lesson.

Mag Cover Photo


Objective
To work towards the copy of a magazine cover

Task
Choose a magazine that has some interesting design elements and look closely at the image. You are to recreate the cover using a camera and Photoshop/InDesgin. 
In order for you to get a decent result you must take the image yourself. Although we can touch up and edit images in Photoshop, there is a limit to what the program can salvage from a bad image. Therefore your image must be as good as it can be. Same pose, similar models, similar clothes, similar background and most importantly, same lighting.

Presentation
Post your contact sheet (what's a contact sheet?) to your course blog

Checklist for assessment
Plenty of trial and error when it comes to getting the correct pose.

Deadline
tbc

Wednesday, 12 October 2016

Magazine Covers - scamp copies


Objective
To further understand the part white space plays in a graphic artefact.
To become aware of how designers balance elements on a page.
Info: A 'scamp' is a first rough or mockup.

Task
Gather a range of front pages from different types of magazines. This can be via Pinterest or your own examples.
In your sketchbook, draw 24 front pages.
Look at your example and loosely sketch the page. Pay close attention to the light and dark tones—allow your brain to 'threshold' the greys into either light or dark tones. See my measly example above.

Presentation
Sketchbook

Checklist for assessment

24 covers.

Time needed
Two hours.

Deadline

Tuesday the 18th of October.

Monday, 10 October 2016

Reading task 2


Objective
To give you an overview of the history of Graphic Design in order to inform your written analysis work

Task
Read the chapters 2 and 3 of Richard Hollis' - The History Of Graphic Design.
N.B. Don't be put off, use a dictionary and the web for help. You are entering the world of grown-up reading with big words and concepts — if you don't work at it, you won't get it. 
Take notes in your notebook.
Write down 6 questions about the text.
Answer 3 yourself and bring 3 in for me or the group to answer.

Presentation
Photograph notes and post to blog.

Checklist for assessment
Detailed notes

Deadline
After half term.

Monday, 26 September 2016

What makes a Corita Kent?

Corita Kent Cut & Paste Poetry


Objective
Look at and emulate the work of Sister Corita Kent.
To utilise differing methods of generating content and design.

Info
The Surrealists used numerous techniques and games to provide inspiration. Many of these are said to free imagination by producing a creative process free of conscious control. The importance of the unconscious as a source of inspiration is central to the nature of surrealism.

Task
You are going to allow this uncertainty to influence and inspire your work... both visually and written. 
Read through the instructions in the presentation above. 
Template HERE


Presentation
Images of sketchbook pages, screenshots of work-in-progress, photographs of final book.

Checklist for assessment
Does it look like a creative nun made it? Does your poem make people weep, sigh or smile? Both should be yes. 

Deadline
TBC


    Monday, 12 September 2016

    Covering your sketchbook.


    Objective
    As you are a Graphic Communication, you will need to communicate your magic powers to the general public! To do this you will create a beautiful sketchbook cover from stuff you have collected.

    Task
    Create a Pinboard that is full of stuff you could cover your sketchbook wth. Consider stickers, photos, artwork, illustrations, patterns, textures, maps, stamps, labels etc etc.
    We will be pasting them into Photoshop and resizing them, so there is no need to print anything off just yet.

    Basic Colouring in Photoshop


    Objective
    To improve your Photoshop skills.
    To further your badge designs.

    Tasks
    Watch the tutorial above to revise the process.
    Colour your badges, backboard and top thingy. Consider the limited colour scheme.

    Presentation
    Screenshot (x 2) your Photoshop work

    Checklist for assessment
    Coloured badge designs.

    Time needed
    2 hrs

    Deadline
    ASAP.

    Inking, scanning and Photoshop editing.


    Objective
    To learn how to ink and scan your designs.
    To utilise Photoshop to edit and layout on a template.

    Task
    Firstly, size doesn't matter.
    Now that you are going to be using Photoshop all the time, you can put away the thought that you must work at the 'end result' size.
    Draw your designs at a comfortable size, that may be 5mm or 50mm wide.
    Use a variety of different drawing implements - fineliner, soft pencil, brush and ink, pencil crayon etc.
    You may use layout paper to trace your original designs for this task if you wish. Just ask.
    Scan the drawings into your Graphics folder and open in photoshop. 
    Lastly, adjust the Threshold accordingly, select and paste them into the 'badges template' 

    Templates!
    Badges HERE    
    Title Card Thingy HERE
    Backboard HERE

    Download them both and save them into your Graphics folder.

    Presentation
    Photograph your inked drawings and post to your blog.

    You will be graded on
    Neatness, use of drawing implement.

    Time needed
    1 hr

    Deadline
    tbc